

Elegant and quiet in-air wave ceiling installation
Project Name
GeoWave
Year
2017
Project Disciplines
Arduino, Arduino, Prototyping, 3D Modeling
Project Description
The goal of this project was to build something organic that has a movement or emits an interesting output. I took this opportunity to build a prototype for an installation that could possibly be hung on a ceiling. If I had unlimited resources, this project could look really beautiful hanging in a mall or spa ceiling. If I were to add some lights, this prototype could have the potential to create some intriguing shadows. Therefore, next steps for this project would be to add some LED’s to it and see the final outcome.
Concept / Materials
Fabrication
Click to view more images
[ngg_images source=”galleries” container_ids=”6″ display_type=”photocrati-nextgen_basic_slideshow” gallery_width=”600″ gallery_height=”400″ cycle_effect=”fade” cycle_interval=”10″ show_thumbnail_link=”0″ thumbnail_link_text=”[Show thumbnails]” order_by=”sortorder” order_direction=”ASC” returns=”included” maximum_entity_count=”500″]
Exhibition / Location Research
Click to view more images
[ngg_images source=”galleries” container_ids=”7″ display_type=”photocrati-nextgen_basic_slideshow” gallery_width=”800″ gallery_height=”600″ cycle_effect=”fade” cycle_interval=”10″ show_thumbnail_link=”0″ thumbnail_link_text=”[Show thumbnails]” order_by=”sortorder” order_direction=”ASC” returns=”included” maximum_entity_count=”500″]
Previous Prototypes
Click to view more images
[ngg_images source=”galleries” container_ids=”8″ display_type=”photocrati-nextgen_basic_slideshow” gallery_width=”800″ gallery_height=”600″ cycle_effect=”fade” cycle_interval=”10″ show_thumbnail_link=”0″ thumbnail_link_text=”[Show thumbnails]” order_by=”sortorder” order_direction=”ASC” returns=”included” maximum_entity_count=”500″]
Process (Rebuilding Model)
From the last process of building the model, I learnt to cut the paper in to smaller pieces so the folds can be more defined and precise. This made for crisp final outcome.
I found that the best way to put the pieces back together was to tape them.
Click to view more images
[ngg_images source=”galleries” container_ids=”9″ display_type=”photocrati-nextgen_basic_slideshow” gallery_width=”600″ gallery_height=”400″ cycle_effect=”fade” cycle_interval=”10″ show_thumbnail_link=”0″ thumbnail_link_text=”[Show thumbnails]” order_by=”sortorder” order_direction=”ASC” returns=”included” maximum_entity_count=”500″]
Electronics Explored
Click to view more images
[ngg_images source=”galleries” container_ids=”10″ display_type=”photocrati-nextgen_basic_slideshow” gallery_width=”600″ gallery_height=”400″ cycle_effect=”fade” cycle_interval=”10″ show_thumbnail_link=”0″ thumbnail_link_text=”[Show thumbnails]” order_by=”sortorder” order_direction=”ASC” returns=”included” maximum_entity_count=”500″]
Circuit of Stepper Motor
Click to view more images
[ngg_images source=”galleries” container_ids=”11″ display_type=”photocrati-nextgen_basic_slideshow” gallery_width=”600″ gallery_height=”400″ cycle_effect=”fade” cycle_interval=”10″ show_thumbnail_link=”0″ thumbnail_link_text=”[Show thumbnails]” order_by=”sortorder” order_direction=”ASC” returns=”included” maximum_entity_count=”500″]
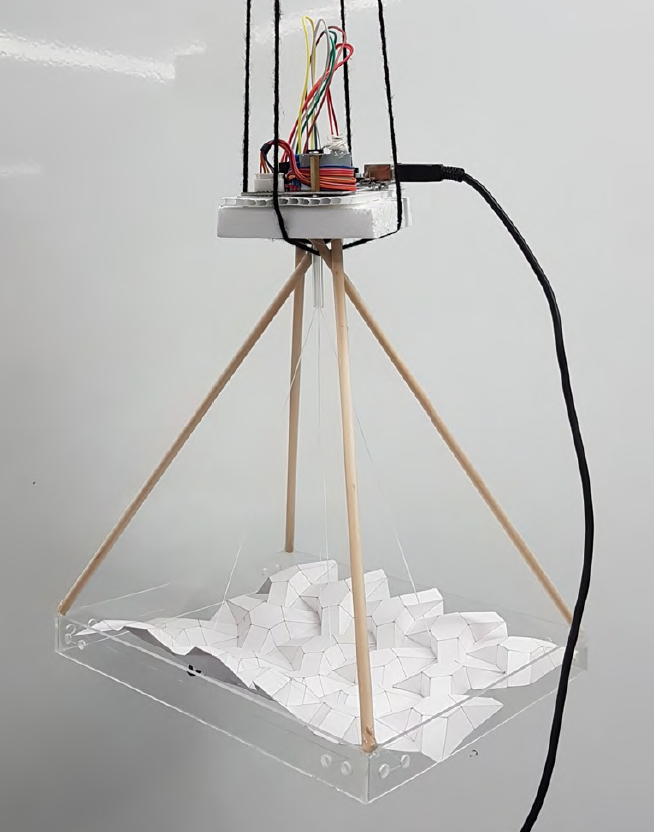
Final Model
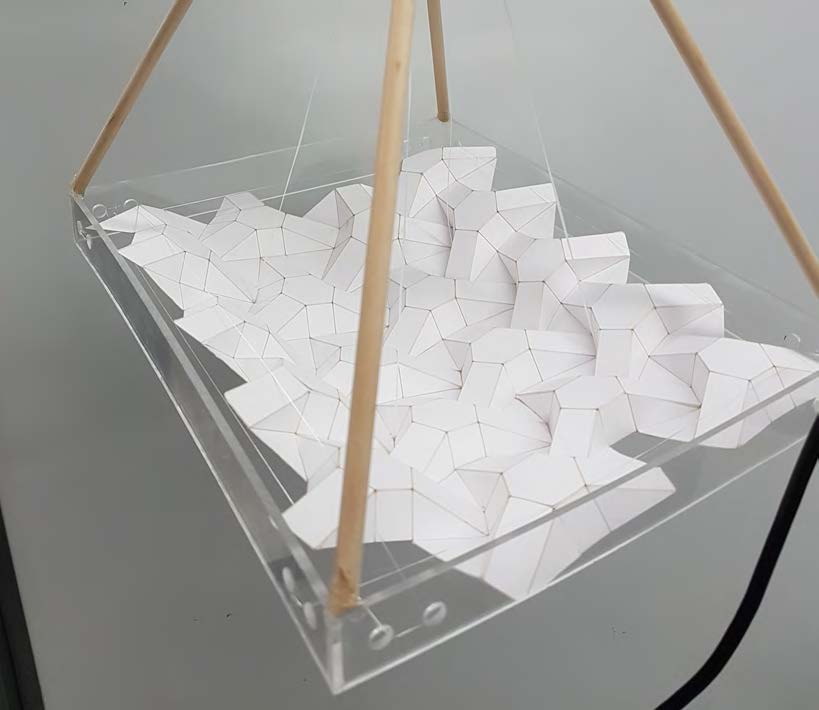
The folded paper is positioned strategically between string that is surrounded by a plexy glass border. This provided a surprisingly sturdy hold that almost looked invisible.
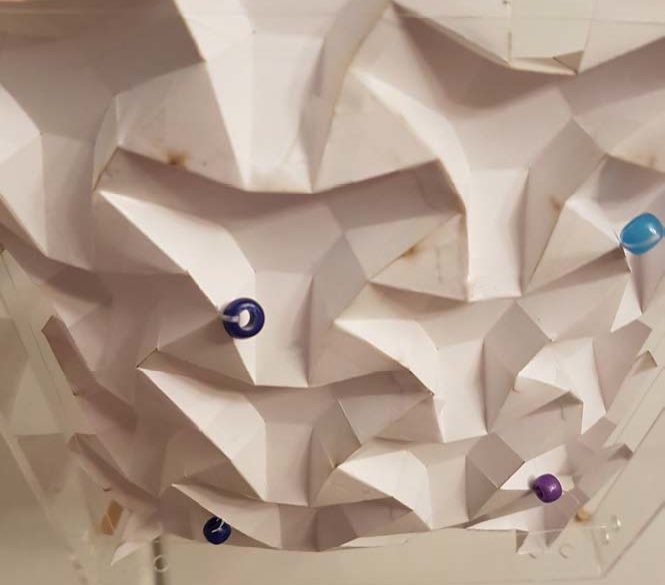
Tiny holes were poked through the paper to get sting in the model. On one end the string is tied to beads to make sure the string would not come out of the model. The other ends of the string is wrapped around the servo motor to move the model up and down.
